
Hello crafty people!
I am Devika Gujral and I am very glad to do my first post with Craftyscrappers.
In today's post, I will be using the stamp set "Snail mail for you" and I must say that the quality of their stamps is very good which leave a crisp image when stamped on.
If you like my work, you can also follow me on these social media accounts:
https://www.facebook.com/houseofillusiondelhi/
https://www.youtube.com/channel/UCNGR6yuGN1tm2HzpwuYQOIA


PRODUCTS USED:
I am Devika Gujral and I am very glad to do my first post with Craftyscrappers.
In today's post, I will be using the stamp set "Snail mail for you" and I must say that the quality of their stamps is very good which leave a crisp image when stamped on.
If you like my work, you can also follow me on these social media accounts:
https://www.facebook.com/houseofillusiondelhi/
https://www.youtube.com/channel/UCNGR6yuGN1tm2HzpwuYQOIA
CARD: SHROOM LAND

•Take a the standard size folded white coloured cardstock of 270-300 GSM and also a woodgrain textured cardstock.

•Cut a small rectangular window in the middle of the Woodgrain cardstock as per your choice.


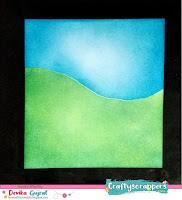
•Create a background on a piece of another white cardstock which will come below this rectangular cut out window.
•For this, cut a hill pattern on a masking sheet, place it on the cardstock.
 •Make a sky using Broken China and Mermaid lagoon distress inks.


•Similarly create a green background using Cracked pistachio and evergreen bough distress inks.


•Stamp the images from the "Snail mail for you" stamp set using Black archival ink on a white paper, colour them using distress inks and water and fussy cut them.


•Adhere the sky-land background on the folded white cardstock base, foam mount the woodgrain texture card on top of it and foam mount the fussy cut images.


•Stamp the sentiment using the Black archival ink.

Hope you all enjoyed this fun filled card deisgn.
Thanks for stopping by!
Do like, share and comment below.
Happy crafting!
- 270GSM white cardstock.
- Woodgrain cardstock.
- Distress inks: Broken China, Mermaid lagoon, Crcaked pistachio, Evergreen Bough, Picket fence, Candid Apple, Sounds sugar, Picked raspberry, Lucky clover, Vintage straw.
- Black Archival ink pad.
- Stamp set from Craftyscrappers.
Lovely
ReplyDeleteThis comment has been removed by the author.
ReplyDeleteLuckng cute
ReplyDeleteLuckng cute
ReplyDeleteLuckng cute
ReplyDelete