
Namaste crafty people! :D
Let's welcome the Autumn season with a pretty floral card!
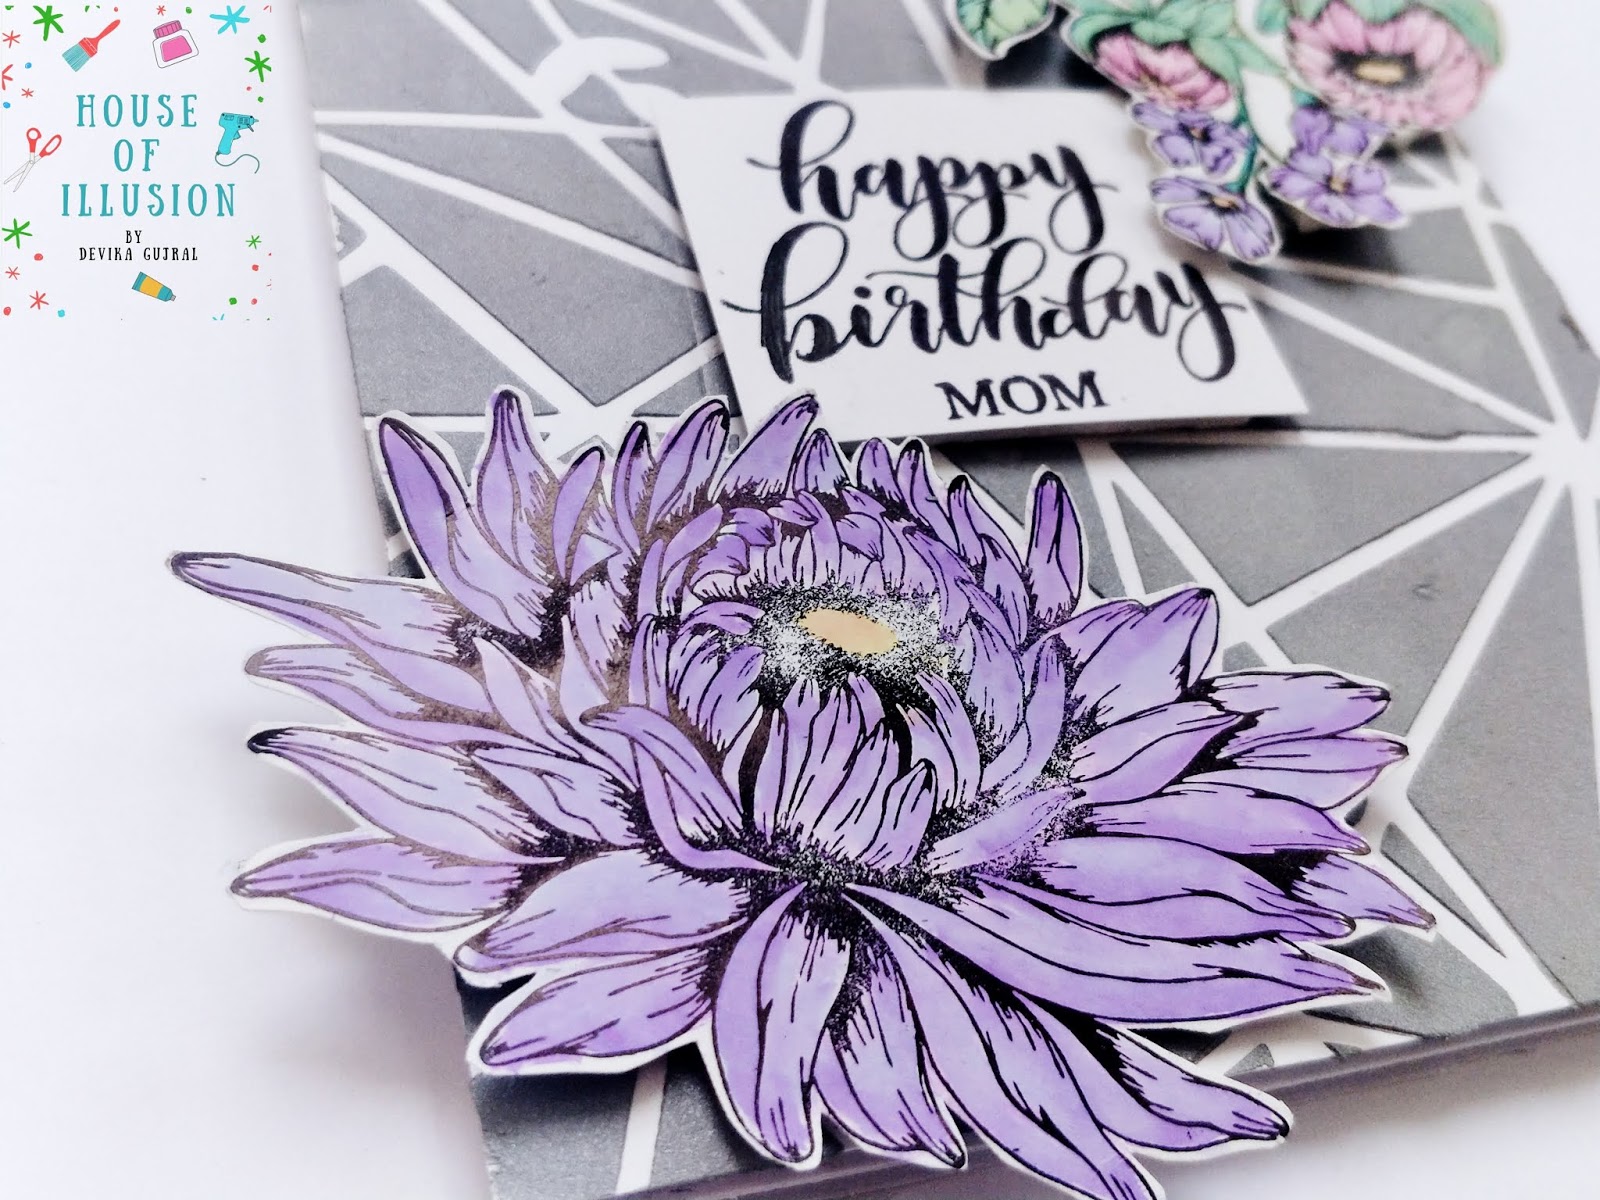
I am not really a floral person BUT THIS "Floral wishes" stamp set by Craftyscrappers has made me fallen in love with florals.. i am not kidding :)
It is designed very intricately with perfect and crisp detailing!
Watercolouring these images is just pure fun..I actually stamped tons of them and made a DIY watercolour booklet for myself :p
If you like my work, you can also follow me on these social media accounts:
https://www.facebook.com/houseofillusiondelhi/
https://www.youtube.com/channel/UCNGR6yuGN1tm2HzpwuYQOIA


Hope it inspires you to create a Floral themed card for the ongoing challenge!
Thanks for stopping by!
Loads of crafty hugs,
Devika.
Products used from Craftyscrappers:
Other products used:
Let's welcome the Autumn season with a pretty floral card!
I am not really a floral person BUT THIS "Floral wishes" stamp set by Craftyscrappers has made me fallen in love with florals.. i am not kidding :)
It is designed very intricately with perfect and crisp detailing!
Watercolouring these images is just pure fun..I actually stamped tons of them and made a DIY watercolour booklet for myself :p
If you like my work, you can also follow me on these social media accounts:
https://www.facebook.com/houseofillusiondelhi/
https://www.youtube.com/channel/UCNGR6yuGN1tm2HzpwuYQOIA
Autumn florals

- Take a sheet of White cardstock from Craftyscrappers.
- Stamp the floral images using Black archival ink pad and a stamping platform.

- Colour the images with any medium you want, I personally love colouring with Distress inks so I coloured the flowers with the inks.
- Distress inks used in sequence from Big flower, Small Flower, Leaves and Pollen: Spun sugar, Worn lipstick, Candid Apple, Picked Rashberry. Shad d lilac, Wilted Violet .Twisted Citron, Cracked pistachio, Everygreen bough. Squeezed lemonade, Carved pumpkin respectively.
- I wanted to create shaded flowers, hence used lighter colour tone for the inside petals and darker shade for the outside petals.

- Fussy cut the images.
- Take the Cracked Floral stencil from Craftyscrappers and apply a thin layer of Fog Dazzle Paste through it.. if you haven't tried their newly launched dazzle pastes, trust me you are MISSING OUT ON IT!
- It's texture is sooo smooth and silky that you will feel like eating it :p
- And it's very easy to apply.

- Stamp the sentiment from the stamp set on white coloured cardstock using Black archival ink and fussy cut it.
- Foam mount the images and you a pretty floral card!


Hope it inspires you to create a Floral themed card for the ongoing challenge!
Thanks for stopping by!
Loads of crafty hugs,
Devika.
Products used from Craftyscrappers:
- Floral wishes stamp set
- Cracked floral stencil
- Fog- Dazzle paste
- White Cardstock
Other products used:
- Black archival ink pad
- Stamping platform
- Distress inks : Spun sugar, Worn lipstick, Candid Apple, Picked Rashberry. Shad d lilac, Wilted Violet .Twisted Citron, Cracked pistachio, Everygreen bough. Squeezed lemonade, Carved pumpkin
beautiful card...
ReplyDeleteThis comment has been removed by the author.
ReplyDeleteThis comment has been removed by the author.
ReplyDeleteLooking amazing
ReplyDeleteLooking amazing
ReplyDeleteLooking amazing
ReplyDelete